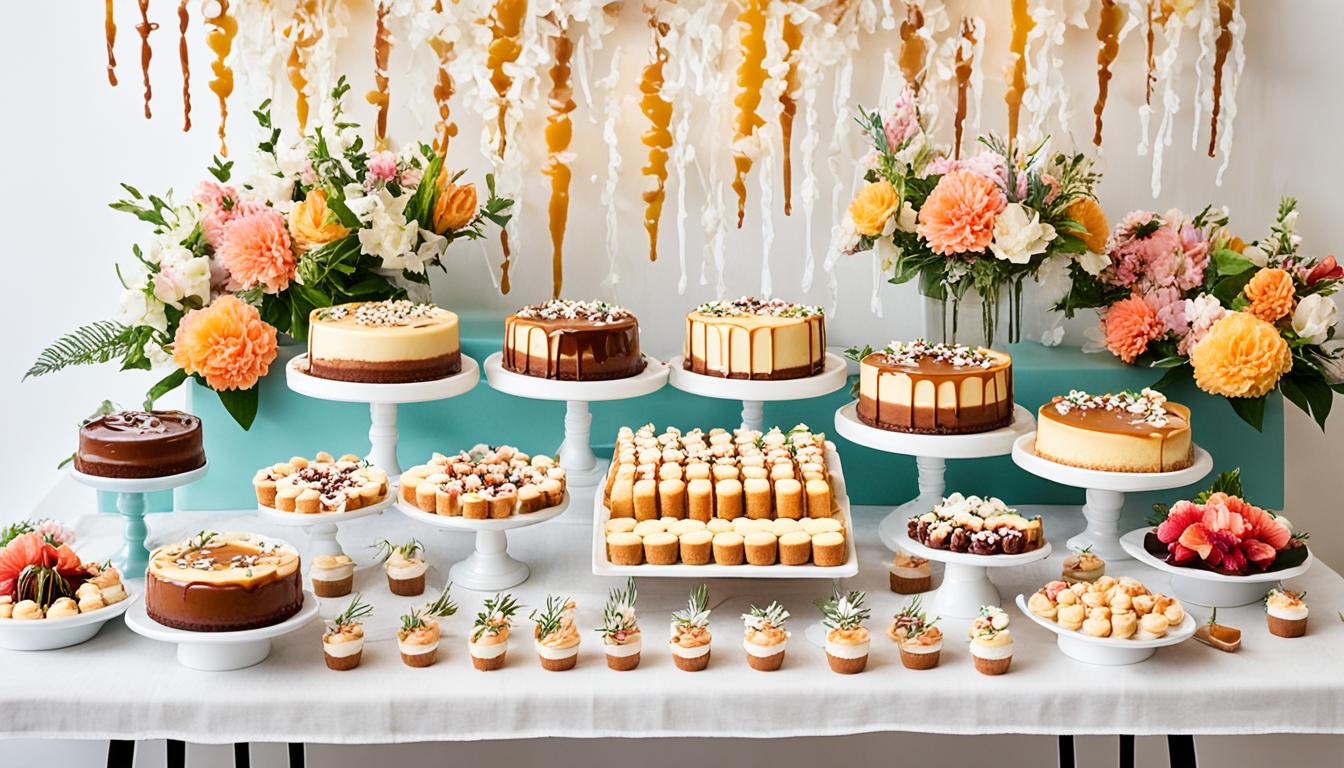
A can of sweetened condensed milk is a versatile ingredient that can be used to create a wide variety of delicious desserts. Whether you’re craving pies, puddings, cakes, cookies, or candies, condensed milk can elevate your homemade treats to a whole new level of indulgence. It adds a creamy and sweet flavor to your desserts, making them irresistible to anyone with a sweet tooth.
In this article, we’ll explore some mouthwatering recipes that make the most of condensed milk’s unique qualities. Get ready to impress your family and friends with decadent and irresistible treats that will leave them asking for more.
Contents
- 1 Creamy Pumpkin Pie Recipe
- 2 Easy Key Lime Pie Recipe
- 3 Layered Dessert Recipe
- 4 Classic Banana Pudding Recipe
- 5 Seven Layer Magic Bars Recipe
- 6 Chocolate Cheesecake Truffles Recipe
- 7 Homemade Rocky Road Ice Cream Recipe
- 8 Easy Caramel Candy Recipe
- 9 Decadent Flan Recipe
- 10 Milk Cake Recipe
- 11 Conclusion
- 12 FAQ
- 12.1 What recipes can I make with condensed milk?
- 12.2 What is a good dessert recipe using condensed milk?
- 12.3 What are the key ingredients in these recipes?
- 12.4 Are these recipes easy to make?
- 12.5 Can I customize these recipes to suit my preferences?
- 12.6 Are these desserts suitable for any occasion?
- 12.7 Where can I find sweetened condensed milk?
- 12.8 Can I make condensed milk at home?
- 12.9 Are these recipes suitable for people with dietary restrictions?
- 12.10 Can I make these desserts ahead of time?
- 12.11 Can I freeze these desserts?
- 12.12 Can I use flavored condensed milk in these recipes?
- 12.13 Do I need any special equipment to make these desserts?
- 13 Source Links
Key Takeaways:
- Condensed milk is a versatile ingredient that can be used in a wide variety of dessert recipes.
- Recipes using condensed milk range from pies and puddings to cakes, cookies, and candies.
- Condensed milk adds a creamy and sweet flavor to desserts, enhancing their taste and texture.
- By exploring these recipes, you can satisfy your sweet tooth and impress your guests with delicious homemade treats.
- Don’t forget to experiment and try new variations to make these recipes your own.
Creamy Pumpkin Pie Recipe
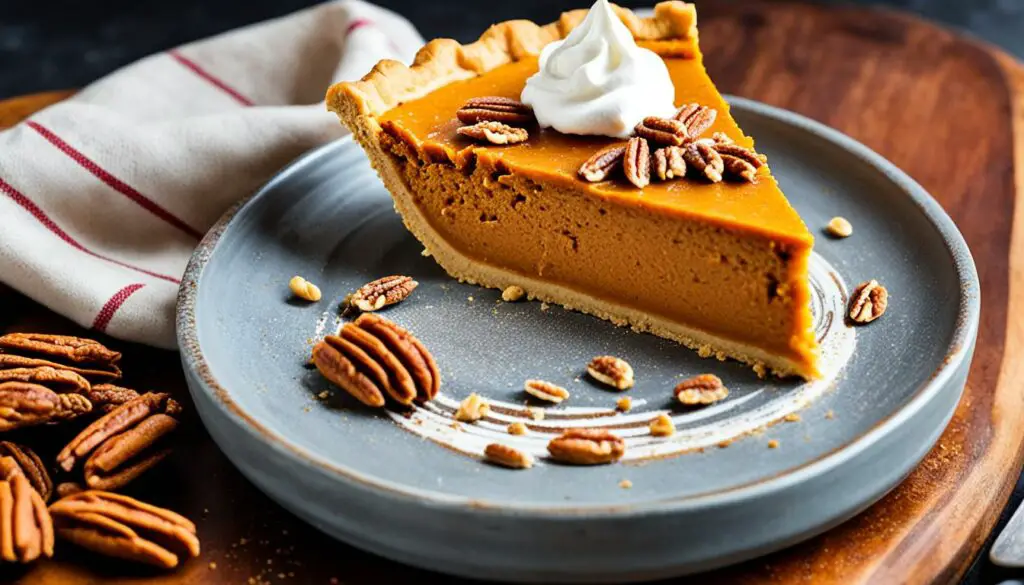
Indulge in the warm and comforting flavors of pumpkin with this deliciously creamy pumpkin pie recipe. Made with a rich and luscious filling, this dessert is perfect for any fall gathering or holiday celebration. The secret ingredient that gives this pie its velvety texture is sweetened condensed milk, adding a touch of sweetness and creaminess.
One of the best parts about this recipe is that it has been perfected over time to ensure a crack-free top, making it both visually appealing and incredibly tasty. The smooth and silky pumpkin custard is perfectly complemented by a buttery and flaky crust, creating a delightful combination that will leave your taste buds craving more.
To serve, top the pie with a dollop of freshly whipped cream and a sprinkle of freshly grated nutmeg. The whipped cream adds a light and airy component to the creamy pie, while the nutmeg adds a warm and aromatic touch. The result is a beautiful and irresistible dessert that will impress your family and friends.
Ingredients:
- 1 9-inch pie crust, pre-baked
- 1 can (15 oz) pumpkin puree
- 1 can (14 oz) sweetened condensed milk
- 2 large eggs, beaten
- 1 teaspoon vanilla extract
- 1 teaspoon ground cinnamon
- 1/2 teaspoon ground nutmeg
- 1/2 teaspoon ground ginger
- 1/4 teaspoon salt
Instructions:
- Preheat your oven to 425°F (220°C).
- In a large bowl, combine the pumpkin puree, sweetened condensed milk, beaten eggs, vanilla extract, ground cinnamon, ground nutmeg, ground ginger, and salt. Mix well until all the ingredients are fully incorporated.
- Pour the pumpkin mixture into the pre-baked pie crust. Smooth the top with a spatula.
- Bake the pie in the preheated oven for 15 minutes. Then, reduce the oven temperature to 350°F (175°C) and continue baking for an additional 35-40 minutes, or until the filling is set and a toothpick inserted into the center comes out clean.
- Remove the pie from the oven and let it cool completely on a wire rack.
- Once cooled, refrigerate the pie for at least 4 hours, or preferably overnight, to allow the flavors to meld together and the pie to fully set.
- To serve, garnish the pie with whipped cream and freshly grated nutmeg.
- Enjoy!
Prepare to be delighted by the creamy and velvety texture of this pumpkin pie. The combination of sweetened condensed milk and pumpkin creates a dessert that is sure to please any pumpkin lover. Whether you’re hosting a Thanksgiving feast or simply craving a taste of fall, this creamy pumpkin pie recipe is the perfect sweet treat.
Easy Key Lime Pie Recipe
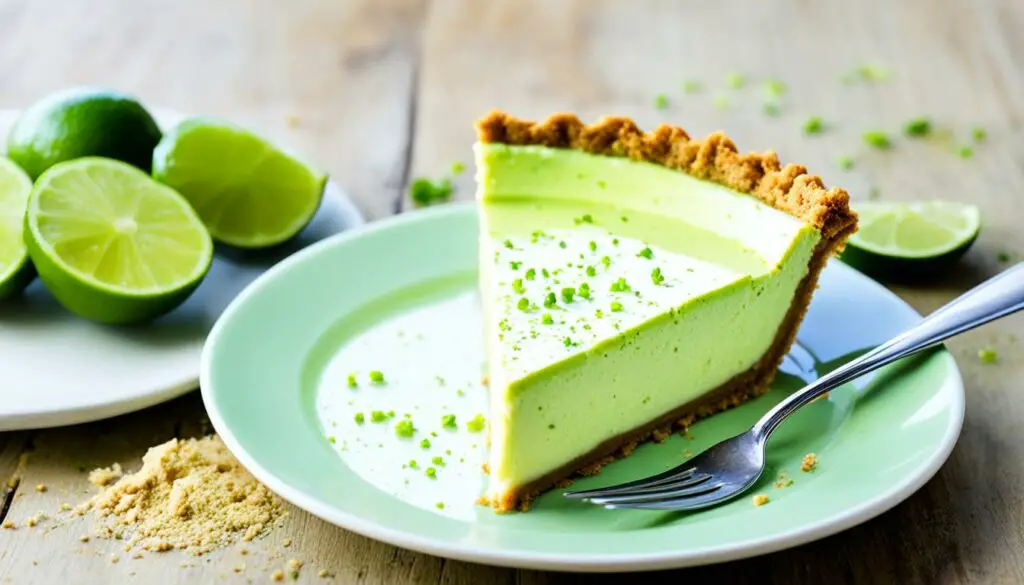
If you’re looking for a fabulously refreshing summertime dessert, look no further than this easy key lime pie recipe. Made with a combination of sweetened condensed milk and sour cream, this pie is the perfect balance of tangy and sweet. And when it’s paired with a homemade graham cracker crust, it takes the flavor and texture to a whole new level. Let’s dive into the details of this delightful recipe.
Ingredients
- 1 1/2 cups graham cracker crumbs
- 6 tablespoons unsalted butter, melted
- 1/4 cup granulated sugar
- 1 can (14 ounces) sweetened condensed milk
- 1/2 cup freshly squeezed key lime juice
- 4 large egg yolks
- 1 cup sour cream
- 1 tablespoon grated lime zest
- Whipped cream and thin lime slices, for garnish
Instructions
- Preheat your oven to 350°F (175°C) and grease a 9-inch pie dish.
- In a medium bowl, combine the graham cracker crumbs, melted butter, and granulated sugar. Mix well until all the crumbs are evenly coated.
- Press the crumb mixture onto the bottom and sides of the prepared pie dish to form the crust.
- Bake the crust for 10 minutes, then remove it from the oven and let it cool completely.
- In a large bowl, whisk together the sweetened condensed milk, key lime juice, egg yolks, sour cream, and lime zest until well combined.
- Pour the filling into the cooled graham cracker crust and smooth the top with a spatula.
- Bake the pie for 15-18 minutes, or until the edges are set but the center still jiggles slightly when shaken.
- Remove the pie from the oven and let it cool to room temperature. Once cooled, refrigerate for at least 4 hours, or overnight, to set.
- When ready to serve, garnish with whipped cream and thin slices of lime.
This easy key lime pie is a refreshing treat that’s perfect for any occasion. The combination of the tangy lime filling, creamy condensed milk, and homemade graham cracker crust creates a dessert that’s sure to impress. So why wait? Try this delightful key lime pie recipe and indulge in a slice of summer.
Layered Dessert Recipe
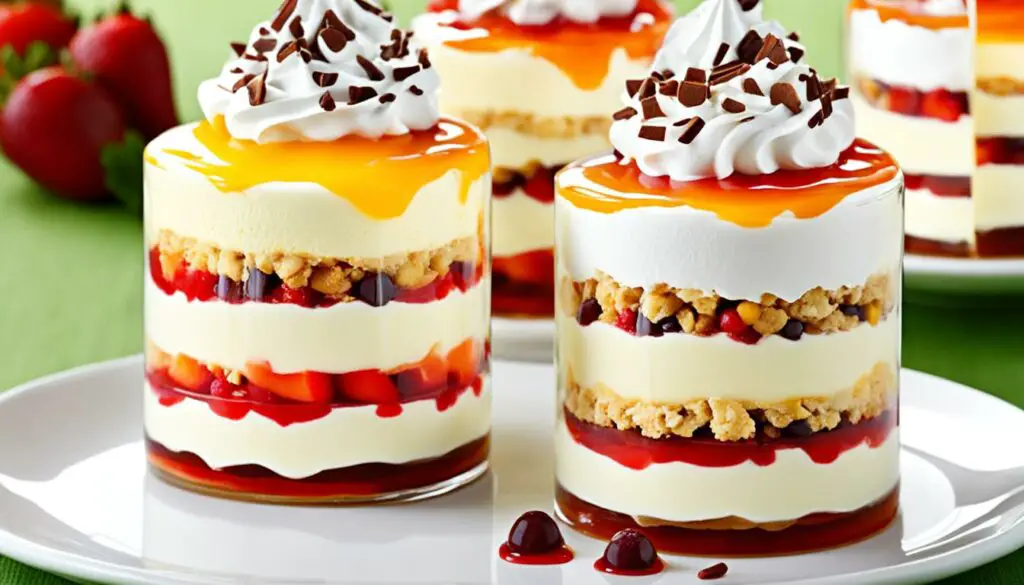
This impressive layered dessert may look complicated, but it’s actually incredibly simple to make. With only seven easy-to-find ingredients, you can create a dessert that will wow your guests and leave them wondering how you did it. The layers of this dessert are made even more delicious with the addition of sweetened condensed milk.
Ingredients:
- 1 package of chocolate sandwich cookies
- 1/2 cup melted butter
- 1 cup chopped nuts (optional)
- 1 cup sweetened shredded coconut
- 1 can of sweetened condensed milk
- 2 cups whipped cream
- 1/2 cup chocolate chips
Instructions:
- In a food processor, crush the chocolate sandwich cookies until they resemble fine crumbs.
- In a bowl, mix the cookie crumbs with melted butter until well combined.
- Press the crumb mixture into the bottom of a 9×9-inch baking dish to create the first layer.
- Sprinkle the chopped nuts and sweetened shredded coconut evenly over the crumb layer.
- Pour the sweetened condensed milk over the nuts and coconut, ensuring it covers the entire layer.
- Spread the whipped cream over the condensed milk layer, creating the third layer.
- Sprinkle the chocolate chips on top of the whipped cream layer.
- Repeat the layers until all the ingredients are used, ending with a layer of whipped cream and chocolate chips on top.
- Cover the baking dish and refrigerate the dessert for at least 4 hours or overnight to allow the flavors to meld together.
- Serve chilled and enjoy!
This layered dessert is a showstopper and will impress everyone who takes a bite. The combination of the crunchy cookie crust, creamy whipped cream, and sweetened condensed milk creates a delectable treat that is sure to satisfy any sweet cravings. Give it a try and enjoy the compliments!
Classic Banana Pudding Recipe
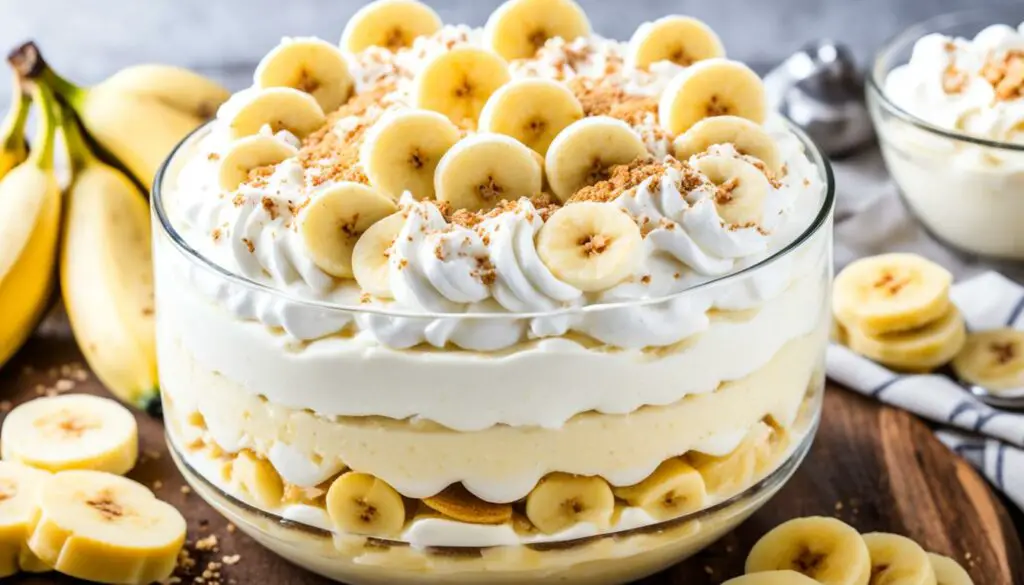
Indulge in the classic flavors of banana pudding with this quick and easy recipe. Made with a few simple ingredients, including sweetened condensed milk, cream cheese, and instant pudding mix, this dessert is a crowd-pleaser that will leave everyone asking for seconds.
Ingredients
- 1 box vanilla wafers
- 4 ripe bananas
- 1 package (8 oz) cream cheese, softened
- 1 can (14 oz) sweetened condensed milk
- 1 package (3.4 oz) instant vanilla pudding mix
- 2 cups cold milk
- 1 teaspoon vanilla extract
- 2 cups whipped topping
Instructions
- In a bowl, beat the cream cheese until smooth. Gradually add the sweetened condensed milk and continue to beat until well combined.
- In a separate bowl, whisk together the instant vanilla pudding mix, cold milk, and vanilla extract until smooth and thickened.
- Add the pudding mixture to the cream cheese mixture and mix until well combined.
- Line the bottom of a 9×13-inch dish with a layer of vanilla wafers. Top with a layer of sliced bananas.
- Pour half of the pudding mixture over the bananas and spread evenly.
- Add another layer of vanilla wafers, followed by sliced bananas, and top with the remaining pudding mixture.
- Finish with a layer of whipped topping and garnish with crushed vanilla wafers, if desired.
- Refrigerate for at least 4 hours, or overnight, to allow the flavors to meld together.
- Serve chilled and enjoy!
| Prep Time | Cook Time | Total Time | Serves |
|---|---|---|---|
| 15 minutes | – | 4+ hours chilling time | 12 servings |
Seven Layer Magic Bars Recipe

If you’re looking for a crowd-pleasing dessert recipe that’s both delicious and easy to make, these seven layer magic bars are the perfect option. With just seven simple ingredients, you can create a sweet treat that will satisfy any sweet tooth. The best part? These bars require minimal effort, making them ideal for busy days or last-minute gatherings.
These magic bars get their name from the mesmerizing layers of flavors and textures that are packed into each bite. Here’s what you’ll need:
- Graham cracker crumbs: The buttery and slightly sweet graham cracker crumbs form the base of these bars, providing a delicious foundation for the layers above.
- Sweetened condensed milk: The magic binding ingredient that holds all the layers together. It adds a creamy and sweet touch to the bars.
- Chocolate chips: Rich and melty, the chocolate chips add a decadent element to the bars. Use your favorite type, whether it’s milk, dark, or semi-sweet.
- Shredded coconut: The coconut flakes add a tropical twist to the bars. They toast up during baking, adding a delightful crunch and flavor.
- Nuts: Choose your favorite nuts, such as walnuts or pecans, to add a satisfying crunch and nutty flavor to the bars.
- Butter: The butter binds the graham cracker crumbs together and helps create a golden and crispy crust.
- Sweet extras: Feel free to customize your bars by adding extras like butterscotch chips, dried fruits, or mini marshmallows.
Here’s how to bring all these layers together:
- Melt the butter and mix it with the graham cracker crumbs. Press the mixture into the bottom of a greased baking dish to create the crust.
- Pour the sweetened condensed milk evenly over the crust.
- Sprinkle the chocolate chips, shredded coconut, and nuts over the condensed milk layer.
- Press everything down gently with the back of a spoon to ensure the layers stick together.
- Bake the bars in a preheated oven until golden and bubbly, usually around 25-30 minutes.
- Allow the bars to cool completely before cutting them into squares or rectangles.
- Serve and enjoy!
These seven layer magic bars are the perfect combination of sweet, crunchy, and chewy, all held together by the magic of condensed milk. They make a great addition to any dessert spread and are guaranteed to be a hit with family and friends. So go ahead, whip up a batch of these irresistible bars and watch them disappear in no time!
Chocolate Cheesecake Truffles Recipe
Indulge in the decadence of these chocolate cheesecake truffles. With a creamy chocolate cheesecake filling nestled in a rich chocolate cookie crust, these bite-sized treats are sure to satisfy any chocolate lover’s cravings. But what takes these truffles to the next level of indulgence? The addition of sweetened condensed milk, which elevates the creaminess and sweetness of the filling.
These truffles are perfect for special occasions, holiday gatherings, or simply treating yourself to a little bite of luxury. With their smooth texture, intense chocolate flavor, and irresistible sweetness, they are guaranteed to be a hit at any dessert table.
Here’s a quick overview of the ingredients and steps involved in making these delectable chocolate cheesecake truffles:
| Ingredients | Instructions |
|---|---|
|
|
These chocolate cheesecake truffles are not only delicious, but they also make a beautiful gift or addition to a dessert spread. The timeless combination of chocolate and cheesecake, enhanced by the creamy sweetness of condensed milk, creates a truly irresistible treat. Whether you’re a fan of truffles, chocolate cheesecake, or condensed milk, these bite-sized delights are a must-try.
Homemade Rocky Road Ice Cream Recipe
Why buy store-bought ice cream when you can make your own homemade rocky road ice cream with just seven ingredients? This recipe combines sweetened condensed milk with cream and a few other simple ingredients to create a rich and creamy treat. It’s perfect for hot summer days or anytime you’re craving a cool and indulgent dessert.
Ingredients:
- 2 cups heavy cream
- 1 can (14 oz) sweetened condensed milk
- 1 teaspoon vanilla extract
- 1/2 cup chocolate chips
- 1/2 cup chopped almonds
- 1/2 cup mini marshmallows
- 1/4 cup chocolate fudge sauce (optional)
Instructions:
- In a medium bowl, whip the heavy cream until stiff peaks form.
- In a separate large bowl, mix together the sweetened condensed milk and vanilla extract.
- Gently fold the whipped cream into the condensed milk mixture until well combined.
- Add the chocolate chips, chopped almonds, and mini marshmallows to the mixture, stirring gently to distribute them evenly.
- Pour the ice cream mixture into a loaf pan or airtight container.
- If desired, drizzle the top with chocolate fudge sauce and use a knife to create swirls.
- Cover the pan or container with plastic wrap or a tight-fitting lid and freeze for at least 6 hours or overnight.
- Scoop the homemade rocky road ice cream into bowls or cones, and enjoy!
Whether you’re hosting a summer gathering or simply satisfying your own sweet tooth, this homemade rocky road ice cream is sure to be a hit. The combination of creamy ice cream, crunchy almonds, gooey marshmallows, and chocolatey goodness will have everyone coming back for seconds. Give it a try and taste the difference of homemade!
Easy Caramel Candy Recipe
Making homemade caramel candy is easier than you think, and this recipe proves it. With just a few ingredients, including sweetened condensed milk, you can create bite-sized caramel candies that are perfect for snacking or gifting. Wrap them in wax paper for a heartfelt holiday treat.
Here’s what you’ll need:
- 1 can (14 ounces) sweetened condensed milk
- 1 cup granulated sugar
- 1/2 cup unsalted butter
- 1/2 cup light corn syrup
- 1/2 teaspoon vanilla extract
- 1/4 teaspoon salt
Follow these steps to make delicious caramel candy:
- In a medium saucepan, combine the sweetened condensed milk, sugar, butter, corn syrup, vanilla extract, and salt.
- Place the saucepan over medium heat and stir continuously until the mixture comes to a boil.
- Reduce the heat to low and continue cooking for about 20-25 minutes, stirring constantly, until the mixture thickens and turns a golden caramel color. Be careful not to let it burn.
- Remove the saucepan from the heat and let the caramel cool for a few minutes.
- Line a baking dish with parchment paper and pour the caramel mixture into the dish.
- Allow the caramel to cool completely at room temperature or refrigerate for faster cooling.
- Once the caramel is firm, remove it from the baking dish and cut it into bite-sized pieces.
- Wrap each caramel candy in wax paper and store in an airtight container.
This easy caramel candy recipe is perfect for satisfying your sweet tooth or giving as a thoughtful homemade gift. Enjoy the rich and buttery flavor of these melt-in-your-mouth treats!
“Making caramel candy at home is a delightful way to indulge in a sweet and creamy treat. With just a handful of ingredients, you can create a batch of irresistible caramel candies that are sure to impress.”
| Ingredient | Quantity |
|---|---|
| Sweetened condensed milk | 1 can (14 ounces) |
| Granulated sugar | 1 cup |
| Unsalted butter | 1/2 cup |
| Light corn syrup | 1/2 cup |
| Vanilla extract | 1/2 teaspoon |
| Salt | 1/4 teaspoon |
Decadent Flan Recipe
This rich and delicious flan is a cross between a custard and a cheesecake. It may look fancy, but it’s surprisingly simple to make. The secret ingredient is sweetened condensed milk, which adds a creamy and sweet flavor to the dessert. Serve it chilled for the perfect ending to any meal.
Ingredients:
- 1 cup granulated sugar
- 6 large eggs
- 1 can (14 oz) sweetened condensed milk
- 1 can (12 oz) evaporated milk
- 1 tablespoon vanilla extract
Instructions:
- Preheat your oven to 350°F (175°C).
- In a small saucepan, melt the sugar over medium heat until it turns into a golden caramel, stirring constantly. Be careful not to burn it!
- Pour the caramel into a flan mold and swirl it around to coat the bottom evenly.
- In a mixing bowl, whisk together the eggs, sweetened condensed milk, evaporated milk, and vanilla extract until well combined.
- Slowly pour the egg mixture over the caramel in the flan mold.
- Cover the flan mold with aluminum foil and place it in a larger baking pan. Fill the larger pan with hot water until it reaches halfway up the sides of the flan mold.
- Bake for about 1 hour, or until the flan is set but still jiggles slightly in the center.
- Remove the flan from the water bath and let it cool to room temperature.
- Refrigerate the flan for at least 4 hours, or overnight, to completely set.
- To serve, run a knife around the edges of the flan mold to loosen the caramel. Place a serving plate on top of the mold and invert it to release the flan.
Enjoy this decadent flan on its own or top it with whipped cream and caramel sauce for an extra indulgence. It’s the perfect dessert to impress your family and friends!
Milk Cake Recipe
If you’re a milk lover and a cake enthusiast, this milk cake recipe is a must-try! Made with three layers of cake, filling, and topping, this dessert is sure to impress your family and friends. What sets this cake apart is the rich and creamy texture achieved by using four types of milk, including condensed milk, in the filling and topping.
To make this mouthwatering milk cake, follow the steps below:
- Prepare the cake layer:
Start by preheating the oven to 350°F (175°C). Grease and flour a round cake pan.
In a large mixing bowl, combine the following ingredients:
- 2 cups all-purpose flour
- 1 cup sugar
- 1/2 cup milk
- 1/4 cup vegetable oil
- 2 teaspoons baking powder
- 1 teaspoon vanilla extract
- 1/2 teaspoon salt
Mix until the batter is smooth and well combined. Pour the batter into the prepared cake pan and bake for 25-30 minutes, or until a toothpick inserted into the center comes out clean. Once baked, let the cake cool completely.
In a medium mixing bowl, combine the following ingredients:
- 1 cup sweetened condensed milk
- 1/2 cup evaporated milk
- 1/2 cup whole milk
- 1/2 cup heavy cream
Whisk the ingredients together until well blended. This luscious milk mixture will serve as the filling for the cake.
Using a serrated knife, carefully slice the cooled cake horizontally to create two even layers. Place one layer on a serving plate and pour half of the milk filling over it, allowing it to soak into the cake.
Place the second layer of cake on top and pour the remaining milk filling over it. Use a spatula to spread the filling evenly and ensure it soaks into the cake.
In a separate mixing bowl, whip 1 cup of heavy cream with 2 tablespoons of sugar until stiff peaks form. This whipped cream topping adds a final touch of creaminess and sweetness to the cake.
Spread the whipped cream topping over the assembled cake using a spatula. For an extra touch of elegance, garnish with fresh berries or a sprinkle of cocoa powder.
Your milk cake is now ready to be enjoyed! Serve it chilled and savor each creamy and decadent bite.
Indulge your taste buds with this delightful milk cake recipe, and let the creamy combination of four types of milk, including condensed milk, satisfy your dessert cravings. Your friends and family will be impressed by the rich and delicious flavors of this homemade treat!
Conclusion
In conclusion, condensed milk is a true kitchen staple when it comes to creating a variety of delectable desserts. This versatile ingredient can be used in a multitude of ways, from adding creaminess and sweetness to pies and puddings, to enhancing the flavors of cakes and candies.
Whether you’re a baking novice or an experienced pastry chef, these condensed milk recipes offer something for everyone. With just a can of sweetened condensed milk, you can whip up easy and impressive treats that will delight your taste buds and impress your friends and family.
From the creamy pumpkin pie and refreshing key lime pie to the indulgent banana pudding and mouthwatering seven layer magic bars, these recipes showcase the endless possibilities of condensed milk. Whether you’re looking for a quick and easy dessert or a show-stopping centerpiece, these recipes are sure to elevate your sweet creations.
So, next time you find a can of condensed milk in your pantry, don’t hesitate to experiment and get creative. With these condensed milk recipes at your fingertips, you’re well on your way to satisfying your sweet tooth and becoming a dessert superstar!
FAQ
What recipes can I make with condensed milk?
Condensed milk is a versatile ingredient that can be used to create a wide variety of delicious desserts. From pies and puddings to cakes and candies, the possibilities are endless.
What is a good dessert recipe using condensed milk?
Some popular dessert recipes that use condensed milk include pumpkin pie, key lime pie, banana pudding, magic bars, chocolate cheesecake truffles, rocky road ice cream, caramel candy, flan, and milk cake.
What are the key ingredients in these recipes?
The key ingredient in these recipes is sweetened condensed milk, which adds a rich and creamy texture to the desserts. Other common ingredients include graham cracker crusts, cream cheese, chocolate chips, coconut, nuts, sour cream, instant pudding mix, and various types of milk.
Are these recipes easy to make?
Yes, these recipes are designed to be easy to make, even for novice bakers. They require simple ingredients and straightforward instructions, making them perfect for anyone looking to satisfy their sweet tooth.
Can I customize these recipes to suit my preferences?
Absolutely! These recipes are meant to be versatile, and you can easily customize them to suit your taste. Add your favorite toppings, adjust the sweetness, or experiment with different flavors to make the desserts uniquely yours.
Are these desserts suitable for any occasion?
Yes, these desserts are perfect for any occasion, whether it’s a family gathering, a dinner party, or a special celebration. They are sure to impress your guests and leave everyone craving for more.
Where can I find sweetened condensed milk?
Sweetened condensed milk is readily available in most grocery stores, usually in the baking aisle or the canned food section. Look for popular brands like Eagle Brand or Nestle.
Can I make condensed milk at home?
Yes, you can make homemade condensed milk by combining milk and sugar and simmering them together until the mixture thickens. There are many recipes available online that provide step-by-step instructions on making homemade condensed milk.
Are these recipes suitable for people with dietary restrictions?
Some of these recipes can be adapted to accommodate certain dietary restrictions. For example, you can use gluten-free graham cracker crumbs for a gluten-free option or opt for a dairy-free condensed milk substitute for those who are lactose intolerant. However, always check the specific ingredients and consult with a healthcare professional if you have any concerns or allergies.
Can I make these desserts ahead of time?
Yes, many of these desserts can be made ahead of time, which makes them perfect for parties or gatherings. Be sure to follow the storage instructions provided in each recipe to keep the desserts fresh and delicious.
Can I freeze these desserts?
Some of these desserts can be frozen, but it’s always best to check the specific recipe for freezing instructions. Freezing can alter the texture of certain desserts, so it’s important to follow the recommended guidelines for the best results.
Can I use flavored condensed milk in these recipes?
Yes, you can experiment with flavored condensed milk to add a unique twist to these recipes. Flavored variations, such as chocolate or caramel condensed milk, can enhance the flavor profile of the desserts, providing even more indulgence.
Do I need any special equipment to make these desserts?
Most of these recipes can be made with basic kitchen equipment, such as mixing bowls, baking pans, and utensils. However, some recipes may require a blender or food processor to achieve a smooth texture. Always check the specific recipe for any equipment recommendations.

