Originally posted on March 26, 2024 @ 8:07 pm
Can you use any bread recipe in a bread machine? This is a common question for those who enjoy homemade bread but also want the convenience of using a bread machine. While it may not be possible to convert every bread recipe for a bread machine, there are some basic rules and tips you can follow to increase your chances of success.
Whether you’re a seasoned bread maker or just starting out, understanding how to adapt recipes for your bread machine can open up a world of possibilities. In this article, we’ll explore the factors to consider when using a bread machine, from understanding your machine’s capacity to selecting the right cycle and adding ingredients in the proper order.
Join us as we delve into the art of bread machine baking and discover how to create delicious homemade loaves with the convenience of a bread machine.
Contents
- 1 Understanding the Capacity of Your Bread Machine
- 2 Choosing Recipes for Your Bread Machine
- 3 Tips for Adapting Recipes for Your Bread Machine
- 4 Selecting the Right Cycle for Your Bread Machine
- 5 Adding Ingredients in the Proper Order
- 6 Troubleshooting and Making Adjustments
- 7 Converting Traditional Recipes for Bread Machines
- 8 Benefits and Limitations of Bread Machine Baking
- 9 Exploring the World of Bread Machines
- 10 Bread Machine Tips and Tricks
- 10.1 1. Measure Ingredients Accurately
- 10.2 2. Use Fresh Yeast
- 10.3 3. Adjust Recipes to Machine Capacity
- 10.4 4. Experiment with Settings and Cycles
- 10.5 5. Tenderize with Milk and Fats
- 10.6 6. Add Mix-Ins at the Right Time
- 10.7 7. Don’t Skip Resting Time
- 10.8 8. Troubleshooting Common Issues
- 10.9 9. Clean and Maintain Your Machine
- 10.10 10. Get Creative with Recipe Variations
- 11 Conclusion
- 12 FAQ
- 12.1 Can any bread recipe be made in a bread machine?
- 12.2 How do I understand the capacity of my bread machine?
- 12.3 How do I choose recipes for my bread machine?
- 12.4 What tips are there for adapting recipes for a bread machine?
- 12.5 How do I select the right cycle for my bread machine?
- 12.6 In what order should ingredients be added to the bread machine?
- 12.7 What do I do if I’m not happy with the results of a bread recipe in my machine?
- 12.8 How can I convert traditional recipes for a bread machine?
- 12.9 What are the benefits and limitations of bread machine baking?
- 12.10 How do I explore the world of bread machines?
- 12.11 What tips and tricks are there for bread machine baking?
- 12.12 Can I enjoy fresh, delicious bread with minimal effort using a bread machine?
- 12.13 What are the final thoughts on bread machine baking?
- 13 Source Links
Key Takeaways:
- Not all bread recipes can be successfully made in a bread machine.
- Understanding your bread machine’s capacity is crucial for recipe selection.
- Adapting recipes may require adjustments to ingredients and rising times.
- Experimenting with different cycles and settings can help you achieve desired results.
- Bread machine baking offers convenience but may result in slightly different texture and flavor.
Understanding the Capacity of Your Bread Machine
Before you start experimenting with bread machine recipes, it’s crucial to understand the capacity of your machine. Different bread machines have varying flour capacities, which can directly impact the final outcome of your bread.
Most bread machines available in the market come with three standard capacities: 1 pound, 1 1/2 pounds, and 2 pounds. It’s essential to determine the flour capacity of your specific machine. To do this, refer to the manufacturer’s recipe booklet that accompanies your bread machine. The recipe booklet usually provides a range of flour measurements suitable for your machine’s capacity.
By adhering to the recommended flour measurements, you can ensure that your bread machine functions optimally and produces consistent and delicious bread every time.
Why Does Bread Machine Capacity Matter?
A bread machine’s capacity determines the maximum amount of flour you can use when preparing a bread recipe. Using the correct flour capacity ensures that your bread mixes and kneads thoroughly, enabling the yeast to rise the dough properly. Filling the machine with too little or too much flour can affect the texture, consistency, and overall quality of your bread.
Now that you understand the importance of bread machine capacity, you can proceed confidently to choose the right recipes and create delightful homemade bread with your machine’s capabilities in mind.
Bread Machine Capacity
| Bread Machine Capacity | Flour Measurement Range |
|---|---|
| 1 pound | 1 1/2 to 2 cups |
| 1 1/2 pounds | 2 to 3 cups |
| 2 pounds | 3 to 4 cups |
Refer to this table to determine the appropriate flour measurement range for your bread machine’s capacity. Ensuring accurate measurements will result in beautifully baked bread that satisfies your taste buds.
Choosing Recipes for Your Bread Machine
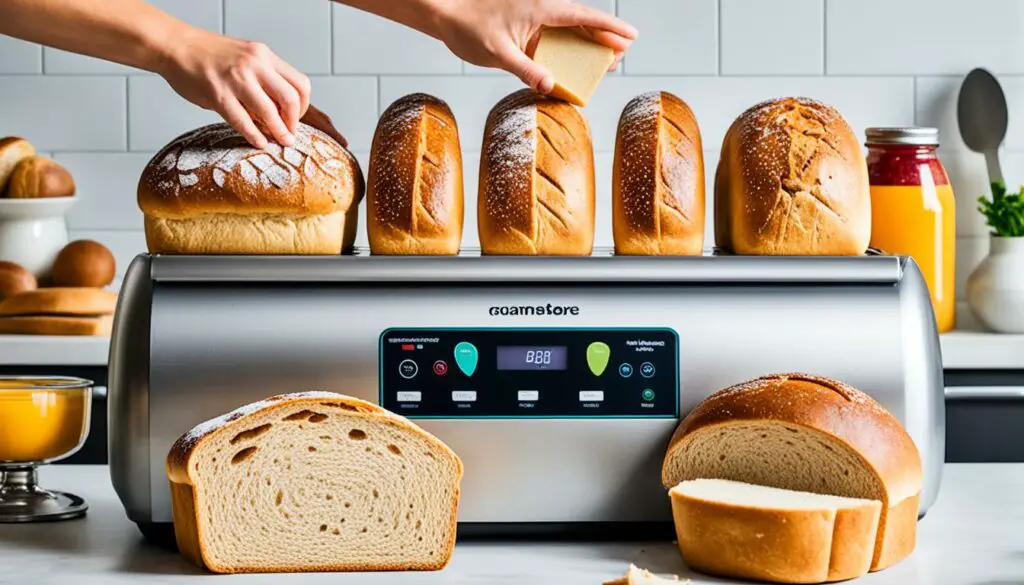
When it comes to choosing recipes for your bread machine, it’s important to consider the capacity of your machine. This will ensure the best baking results and avoid any issues with overflowing dough or undercooked loaves.
Many traditional bread recipes call for 3 to 4 cups of flour, which is perfect for a 1 1/2-pound bread machine. However, if a recipe calls for less flour than your machine’s capacity, you can still give it a try. Just keep in mind that the resulting loaf may be slightly smaller than expected.
If a recipe calls for more flour than your machine’s capacity, you’ll need to make adjustments to the measurements. Increase the ingredients proportionally to fit your machine’s capacity. Be precise with your measurements to ensure the best outcome.
Below is a simple guide to help you choose the right recipes for your bread machine:
| Bread Machine Capacity | Recommended Flour Amount |
|---|---|
| 1-pound machine | 2 to 2 1/2 cups |
| 1 1/2-pound machine | 3 to 4 cups |
| 2-pound machine | 4 1/2 to 5 1/2 cups |
Keep in mind that these are general guidelines, and you may need to adjust the measurements based on the specific recipe and your machine’s capacity. It’s always a good idea to consult your bread machine’s manual for any specific recommendations.
By choosing recipes that match your bread machine’s capacity, you’ll have greater success in baking delicious loaves of bread with your machine.
Tips for Adapting Recipes for Your Bread Machine
When it comes to adapting recipes for your bread machine, a few key considerations can significantly enhance your baking experience. Here are some essential tips and tricks to keep in mind:
1. Adjusting Flour for Mix-ins
If your recipe includes mix-ins like nuts or seeds, it’s crucial to reduce the amount of flour to compensate for these additional ingredients. This adjustment ensures that the final texture of the bread remains consistent and doesn’t become too dense or dry.
2. Choosing the Right Yeast
When converting recipes for bread machine baking, it’s recommended to use instant yeast. Instant yeast is more reliable and convenient compared to active dry yeast. However, if you don’t have instant yeast on hand, you can still use active dry yeast. Just be aware that the rising process may be slower, so you may need to adjust the rising time accordingly.
3. Experimenting with Recipe Ratios
Adapting recipes for a bread machine may require experimenting with different ingredient ratios. While most recipes work well with standard measurements, some adjustments may be needed depending on the capacity and settings of your specific bread machine. It’s always a good idea to start with smaller modifications and gradually make adjustments as needed.
4. Making Notes for Future Reference
As you adapt recipes for your bread machine, it’s essential to keep detailed notes of the modifications you make. This includes changes in ingredient quantities, rising times, and any other adjustments you find necessary. These notes will serve as a valuable resource in the future, allowing you to refine and perfect your bread machine recipes over time.
By following these tips and tricks, you’ll be well-equipped to adapt your favorite bread recipes for your bread machine. Enjoy the convenience and deliciousness of homemade bread with the ease and simplicity of your bread machine.
Selecting the Right Cycle for Your Bread Machine
When it comes to using your bread machine, selecting the right cycle is essential for achieving the perfect loaf. Bread machines offer a variety of cycles, each designed for specific types of bread and dough. By understanding the different cycles and their purposes, you can choose the one that best suits your recipe and desired outcome.
The most common bread machine cycles include:
- Basic Cycle: This cycle is ideal for most bread recipes and is a great starting point for beginners. It typically includes a medium crust setting that yields a golden-brown crust and a soft, fluffy interior. Use the basic cycle for classic white bread, sandwich bread, or any recipe that doesn’t require specific settings.
- Quick Cycle: If you’re short on time and need freshly baked bread in a hurry, the quick cycle can be a lifesaver. This cycle is designed to speed up the bread-making process, reducing the overall baking time. However, it’s important to note that the quick cycle requires instant or rapid yeast for optimal results. Otherwise, the bread may not rise properly.
- Wheat Cycle: The wheat cycle is specifically tailored for whole grain breads and recipes that incorporate whole wheat flour. Whole grain bread requires a longer rising time, and the wheat cycle allows for proper gluten development and fermentation. If you enjoy hearty, nutritious breads, the wheat cycle is your best choice.
It’s important to experiment with different cycles to find the one that works best for your recipes. While the basic cycle is versatile and reliable, don’t be afraid to explore the other options available. Each cycle offers unique settings and adjustments that can enhance the flavor, texture, and crust of your bread.
Remember, the cycle you choose may also depend on personal preference. Some individuals prefer a darker crust, while others prefer a lighter crust. Your bread machine’s instruction booklet will provide more detailed information on each cycle and its corresponding settings.
Below is a visual representation of the different bread machine cycles:
Adding Ingredients in the Proper Order
When it comes to achieving optimal results in your bread machine, the order in which you add ingredients is key. While specific instructions can vary depending on your machine, there are general guidelines that can help you get it right each time.
In most cases, you’ll want to start by adding the liquid ingredients first. This includes water, milk, oil, and any other liquids specified in your recipe. Pour them into the bread pan before moving on to the next step.
Next, it’s time to add the flour. Measure out the required amount and carefully pour it into the bread pan, making sure it covers the liquid ingredients completely. This will allow for proper mixing and consistency.
Once the flour is in place, you can add the remaining dry ingredients, such as sugar, salt, yeast, and any other spices or flavorings. It’s important to distribute them evenly across the surface of the flour to ensure consistent flavor throughout the loaf.
Note: Some older recipes may call for scalding milk before adding it to the bread machine. However, with modern pasteurized milk, this step is unnecessary and can be skipped. Always follow the instructions provided by your recipe or machine’s booklet for the best outcome.
| Order of Adding Ingredients in a Bread Machine | |
|---|---|
| Step | Ingredient |
| 1 | Liquid ingredients (water, milk, oil, etc.) |
| 2 | Flour |
| 3 | Dry ingredients (sugar, salt, yeast, spices, etc.) |
By following this order of ingredient addition, you’ll ensure that your bread machine operates smoothly and produces delicious loaves of bread. Remember to consult your machine’s instruction booklet for any specific guidelines, as different models may have varying recommendations.
Troubleshooting and Making Adjustments
If you find that you’re not getting the desired results from your bread machine recipes, don’t worry! There are several troubleshooting steps you can take to improve your baking experience. Let’s explore some adjustments you can make to troubleshoot and optimize your bread machine recipes.
1. Adjusting Yeast Amount
One common issue is when the bread rises too much and then collapses during baking. This can happen if you’re using too much yeast. To fix this, try reducing the amount of yeast in your recipe. You can experiment by using slightly less yeast and see if it yields better results.
2. Manual Baking
If you find that your bread consistently turns out too large for your bread machine, you can try using the dough (manual) cycle to prepare the dough and then bake it separately in your oven. This will give you more control over the size and shape of your loaf. Remember to adjust the baking time and temperature accordingly when using this method.
3. Experimentation and Adjustments
Remember that baking with a bread machine is not an exact science. It may take some trial and error to find the perfect settings and adjustments for your recipes. Don’t be afraid to experiment and make small changes along the way. Keep track of your adjustments and take notes so you can replicate successful results in the future.
4. Additional Troubleshooting Tips
Here are a few more troubleshooting tips to help you refine your bread machine recipes:
- Ensure that you’re measuring your ingredients accurately. Using a digital kitchen scale can help ensure precision.
- Check the expiration date of your yeast. Fresh yeast is essential for optimal bread rising.
- Make sure you’re using the appropriate cycle for your recipe. Different bread machines offer various cycles, such as basic, whole wheat, or gluten-free.
- Consider adjusting the bread machine settings, such as crust color and loaf size, to match your preference.
Remember, troubleshooting and making adjustments is a natural part of the bread machine baking process. By following these tips and being patient with your experiments, you’ll soon be able to enjoy delicious homemade bread that meets your expectations.
Converting Traditional Recipes for Bread Machines
Converting your favorite traditional bread recipes for a bread machine is not only possible but can also open up a whole new world of convenience and delicious homemade bread. With a few modifications and adjustments, you can adapt your beloved family recipes to work perfectly in your bread machine.
One common adjustment is to halve the recipe to match the capacity of your machine. This ensures that the ingredients will fit properly and that the bread will bake evenly. Halving the recipe also allows for better control of the rising process and ensures a perfectly sized loaf.
Another important modification is to adjust the amount of yeast used in the recipe. The rising cycles of your bread machine may differ from the traditional proofing times, so it’s essential to experiment and find the right amount of yeast to achieve the desired rise and texture. Start by reducing the amount of yeast slightly and monitor the results. Make small changes at a time to determine what works best for your specific recipe.
Throughout the process of converting traditional recipes for your bread machine, it’s important to take detailed notes and keep track of your adjustments. This will allow you to fine-tune the recipe over time and achieve consistent and delicious results.
Here’s a helpful table summarizing the key adjustments you may need to make when converting traditional bread recipes for your bread machine:
| Adjustment | Modification |
|---|---|
| Recipe Quantity | Halve the recipe to match the machine’s capacity |
| Yeast Amount | Reduce the amount of yeast used |
| Rising Time | Monitor the rising cycle and adjust as needed |
| Additional Ingredients | Consider any mix-ins, nuts, or seeds and adjust flour accordingly |
Remember, the process of converting traditional recipes for your bread machine may require some experimentation and adjustments. Don’t be discouraged if the first attempt doesn’t turn out perfectly. With practice and patience, you’ll master the art of adapting handmade recipes for your bread machine, allowing you to enjoy freshly baked bread with minimal effort.
Benefits and Limitations of Bread Machine Baking
When it comes to baking bread, a bread machine offers numerous benefits that make the process easier and more convenient. With just a few simple steps, you can enjoy fresh homemade bread without the need for extensive manual labor. Here are some of the key benefits of bread machine baking:
- Convenience: With a bread machine, you can simply add the ingredients, select the appropriate settings, and let the machine do the rest of the work. There’s no need to knead the dough or wait for it to rise – the machine takes care of everything for you.
- Time-saving: Baking bread in a machine saves you precious time in the kitchen. Instead of spending hours kneading and waiting for the dough to rise, you can set the machine and continue with other tasks while the bread bakes.
- Versatility: Bread machines offer a wide variety of settings and cycles, allowing you to bake different types of bread, from white and whole wheat to gluten-free and artisanal loaves. You can even experiment with different ingredients and flavors to create unique bread recipes.
- Consistency: Bread machines provide consistent results every time you bake. The machine ensures that the dough is mixed and kneaded evenly, guaranteeing a well-risen and perfectly baked loaf of bread.
Despite these benefits, it’s important to be aware of the limitations of bread machine baking. While the convenience and time-saving aspects are significant advantages, there are a few factors to consider:
- Bread Texture: Bread baked in a machine may have a slightly different texture compared to handmade bread. It can be drier and less tender, which may not suit everyone’s preference.
- Limited Creativity: Although there are many recipes available for bread machines, you may find yourself limited by the machine’s capacity and settings. It may not be possible to convert all your favorite bread recipes to the machine.
- Crust Control: While bread machines offer options for crust control, it may be challenging to achieve the desired crust texture and color. The crust may come out softer or lighter than desired.
Despite these limitations, bread machine baking remains a popular choice for those who seek convenience and enjoy the aroma and taste of freshly baked bread. Understanding these benefits and limitations can help you make informed decisions when selecting recipes and using your bread machine.
Exploring the World of Bread Machines
Bread machines have revolutionized home baking, offering convenience and tempting aromas of freshly baked bread without the hassle. With their popularity increasing over the years, there is now a wide variety of brands and models available, each with its own unique features and capacities. To make the most out of your bread machine baking experience, it’s essential to explore the world of bread machines and find the one that suits your needs and desired baking style.
When researching bread machine variants, you’ll come across a range of options from renowned brands like Panasonic, Cuisinart, and Zojirushi, among others. These machines can offer different sizes, such as 1-pound, 1 1/2-pound, and 2-pound capacity, allowing you to make smaller or larger loaves depending on your preferences.
One important aspect to consider when exploring different bread machines is their features. Some machines offer programmable settings, allowing you to customize the baking process to achieve the perfect loaf of bread. Others may come with pre-programmed options for specific types of bread, such as whole wheat or gluten-free. Additionally, certain models may have additional features like a delayed start timer, crust control settings, or even the ability to make dough for other pastries like pizza or cinnamon rolls.
Reading reviews from other bread machine enthusiasts can provide valuable insights into the pros and cons of different models. Look for feedback on the machine’s performance, ease of use, durability, and overall customer satisfaction. Websites, online forums, and social media communities dedicated to bread machine baking can be great sources of information and inspiration.
Furthermore, it’s important to learn about the specific capabilities of your chosen bread machine. Familiarize yourself with its instructions, including recommended ingredients, bread machine cycles, and any specific requirements for successful bread baking. Understanding the features and capacities of your machine will help you optimize your baking results and create delicious loaves of bread tailored to your preferences.
Choosing the Right Bread Machine for You
When selecting a bread machine, consider your baking goals, preferences, and budget. Think about the types of bread you want to bake and the capacity that would suit your needs. If you enjoy experimenting with different recipes and making artisan-style bread with unique ingredients, you might want to opt for a machine with more advanced features and customization options.
On the other hand, if you prefer simplicity and just want a basic machine that can reliably produce delicious loaves of bread, a more straightforward model may be the right choice for you. Remember that a quality bread machine can be an investment in your baking journey, so it’s worth considering both the short-term and long-term benefits of each machine you’re considering.
Once you’ve selected your ideal bread machine, it’s time to embark on a new adventure in bread baking. With a little practice and experimentation, you’ll soon be able to enjoy fresh, homemade bread whenever you desire, thanks to your trusty bread machine.
Bread Machine Tips and Tricks
Using a bread machine can be a learning process, but with these tips and tricks, you can improve your baking results and become a bread machine pro.
1. Measure Ingredients Accurately
Accurate measurements are crucial for successful bread machine baking. Use measuring cups and spoons specifically designed for dry and liquid ingredients to ensure precise amounts.
2. Use Fresh Yeast
Fresh yeast is essential for achieving the best rise and flavor in your bread. Check the expiration date and store yeast properly in the refrigerator to maintain its freshness.
3. Adjust Recipes to Machine Capacity
Every bread machine has a specific capacity for flour and liquid. Follow the manufacturer’s guidelines and adjust your recipes accordingly. Overloading the machine can result in dense and misshapen loaves.
4. Experiment with Settings and Cycles
Don’t be afraid to venture beyond the basic cycle. Try different settings and cycles, such as whole wheat or sweet, to discover the perfect combination for your favorite recipes. Each cycle can produce unique textures and flavors.
5. Tenderize with Milk and Fats
To achieve a soft and tender texture, consider using milk or fats like butter or oil in your recipes. These ingredients can add richness and improve the overall taste of your bread.
6. Add Mix-Ins at the Right Time
If you’re adding ingredients like nuts, seeds, or dried fruits to your bread, make sure to add them at the proper time according to your machine’s instructions. Adding them too early can result in uneven distribution or overmixing.
7. Don’t Skip Resting Time
After baking, allow your bread to rest in the machine for a few minutes, or transfer it to a wire rack to cool completely. This resting time helps the bread set and prevents it from becoming too dense or gummy.
8. Troubleshooting Common Issues
If you encounter problems with your bread machine, consult the troubleshooting guide provided by the manufacturer. Common issues like undercooked centers or collapsed loaves usually have simple solutions, such as adjusting the amount of yeast or adapting the baking time.
9. Clean and Maintain Your Machine
Regular cleaning and maintenance can extend the lifespan of your bread machine. Follow the manufacturer’s instructions for cleaning the baking pan, paddle, and other components. Pay attention to any signs of wear and tear and address them promptly.
10. Get Creative with Recipe Variations
Once you have mastered basic bread machine recipes, don’t be afraid to get creative and experiment with different flavors, seasonings, and ingredients. Use the foundation of your favorite recipes as a starting point for unique and delicious variations.
| Tips | Benefits |
|---|---|
| Measure ingredients accurately | Ensures consistent results |
| Use fresh yeast | Improves rise and flavor |
| Adjust recipes to machine capacity | Prevents dense and misshapen loaves |
| Experiment with settings and cycles | Unlocks unique textures and flavors |
| Tenderize with milk and fats | Enhances softness and richness |
| Add mix-ins at the right time | Ensures even distribution |
| Don’t skip resting time | Allows bread to set properly |
| Troubleshoot common issues | Quickly resolve baking problems |
| Clean and maintain your machine | Increases machine longevity |
| Get creative with recipe variations | Explore new flavors and combinations |
Remember, practice makes perfect when it comes to bread machine baking. Don’t be discouraged by a few unsuccessful attempts. With time and patience, you’ll be able to create delicious, homemade bread that rivals any bakery.
Conclusion
Bread machine baking offers a convenient way to enjoy homemade bread with minimal effort. With the right tips and guidelines, you can increase your chances of success when using a bread machine. Although not all recipes can be converted for a bread machine, experimenting with different recipes, cycles, and settings can help you find the perfect combination for your machine. With practice and patience, you can become a master of bread machine baking and savor fresh, delicious bread whenever you desire.
FAQ
Can any bread recipe be made in a bread machine?
While it may not be possible to convert every bread recipe for a bread machine, there are some basic rules and tips you can follow to increase your chances of success.
How do I understand the capacity of my bread machine?
Different bread machines have different flour capacities, which can affect the outcome of your bread. Refer to the manufacturer’s recipe booklet to determine your machine’s flour capacity.
How do I choose recipes for my bread machine?
It’s best to choose recipes that match your machine’s flour capacity. If a recipe calls for less flour, adjust the measurements accordingly. If it calls for more, adjust accordingly or use the dough (manual) cycle and bake in your oven.
What tips are there for adapting recipes for a bread machine?
Consider factors like mix-ins and adjust the amount of flour and yeast used. Instant yeast is recommended for bread machine baking.
How do I select the right cycle for my bread machine?
Start with the basic cycle with a medium crust setting. Experiment with different cycles to find the one that works best for your recipes.
In what order should ingredients be added to the bread machine?
Refer to your machine’s instruction booklet, but generally, add liquid ingredients first, followed by the flour and then the remaining dry ingredients.
What do I do if I’m not happy with the results of a bread recipe in my machine?
If the bread consistently rises and then falls, try reducing the amount of yeast used. If the loaf is consistently too large, use the dough cycle and bake it separately in your oven.
How can I convert traditional recipes for a bread machine?
Common adjustments include halving the recipe and adjusting the amount of yeast used. Take detailed notes and make small changes to find what works best for your recipe.
What are the benefits and limitations of bread machine baking?
Bread baked in a machine may be slightly different from handmade bread, but it offers convenience. Understand the differences to make informed decisions about which recipes to try.
How do I explore the world of bread machines?
Research different brands and models to find one that suits your needs and desired baking style.
What tips and tricks are there for bread machine baking?
Measure ingredients accurately, use fresh yeast, and adjust recipes based on your machine’s capacity. Experiment with different settings and cycles.
Can I enjoy fresh, delicious bread with minimal effort using a bread machine?
Yes, bread machine baking offers convenience and simplicity. With practice and patience, you can become a master of bread machine baking.
What are the final thoughts on bread machine baking?
Bread machine baking provides a convenient way to enjoy homemade bread. Experiment, make small adjustments, and enjoy fresh bread whenever you desire.

